How do I create a glossary?
You often need an overview of the existing descriptions of a person, a place or an object. Use tags to automatically create a glossary.
You can assign three types of tags for each text block: people, places and objects. You will find three tabs in the toolbar on the right that you can use to open the respective glossary section.
Tip: Keywords are always linked to a text block in the document. If you want to mark a place where there is no description, it is better to look at the “Markers” in the previous chapter.
Adding Tags
To tag a person do the following:
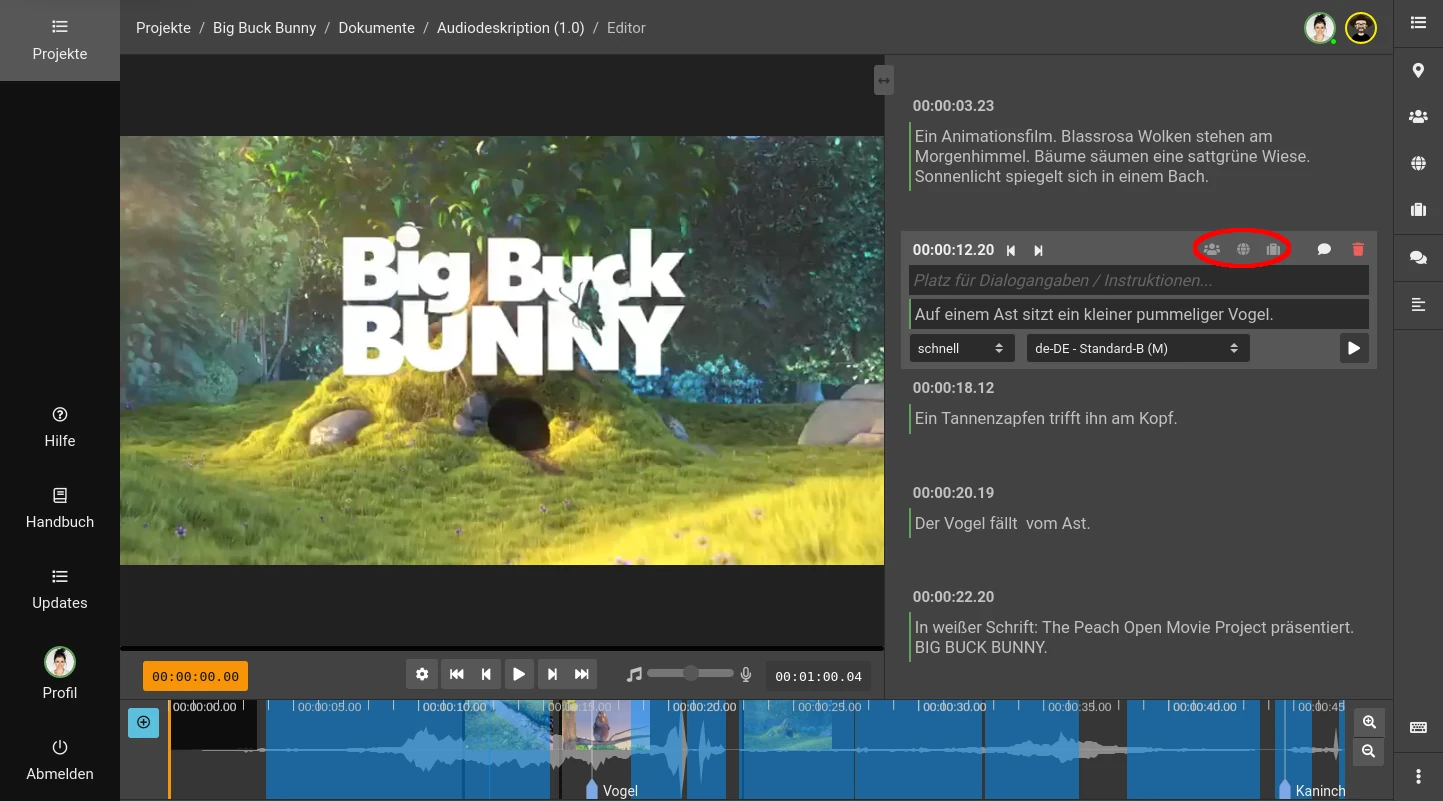
- Click on a text block in the document to activate it.
- Click on the “People” icon at the top right of the text block. This will open a dialog with an input field.
- Enter the person’s name in the dialog box, e.g. “Lukas”. 😉
- Click on “OK”.
If you want to mark places or objects, click on the corresponding icon.
Tip: You can create multiple tags of one type for a text block, for example to tag multiple people in a description. To do this, separate the tags with a comma. For example, if you write “Lukas, Christian” in the dialog box, Frazier will create two entries in the glossary - once for “Lukas” and once for “Christian”.
View all descriptions
If you have already opened the glossary via the toolbar on the right, it will be updated automatically. Otherwise, click on the “People” icon on the right in the toolbar.
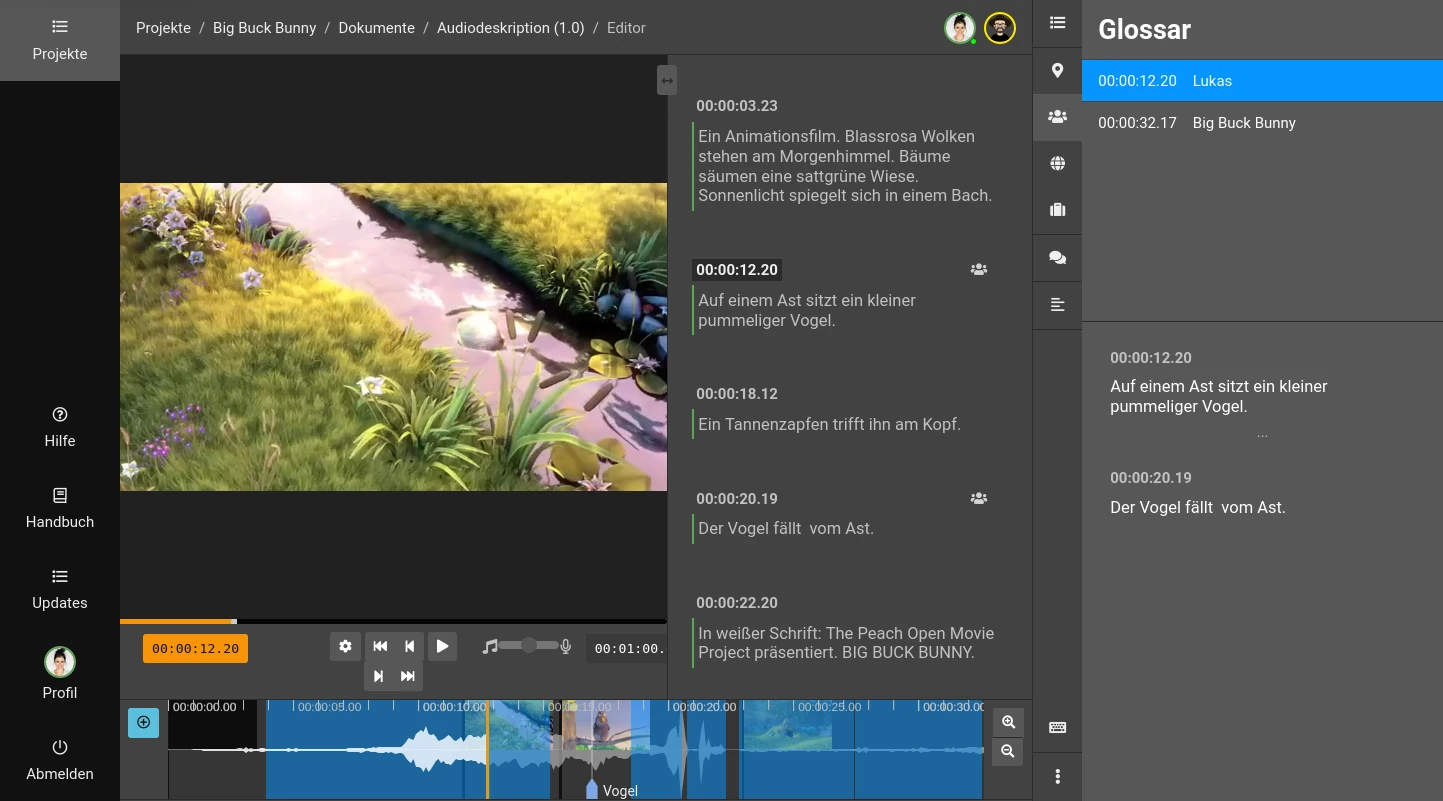
A list opens with all the tags you have assigned (e.g. “Lukas”…). Click on a tag and you will see the associated descriptions including timecode. Click on a description and jump directly to the corresponding point in the video.
Deleting Tags
- Activate the corresponding text block again.
- Click on the appropriate icon again, e.g. “People” to open the dialog.
- Delete the text in the input field.
- Click “OK”.
The glossary is automatically updated and the current description is removed from the glossary. If the deleted tag is no longer used in the entire document, the tag itself will also be deleted from the glossary.
Export glossary
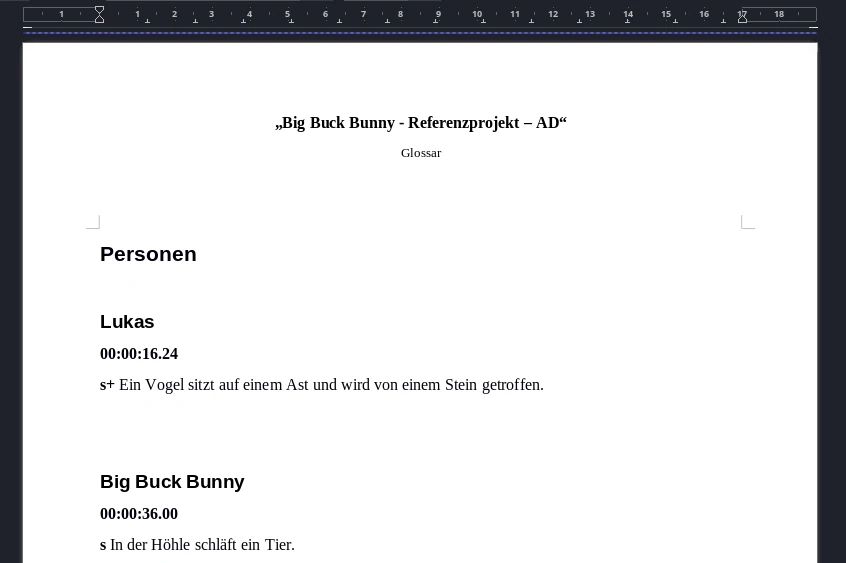
You can export the glossary as a Word document in .docx format.
- Click on the “Download” icon at the top right of the glossary.
- Alternative: Select the “Export Glossary” option in the context menu at the bottom right of the editor.
- The glossary will now be downloaded to your computer.
Last Update: 2023/10/12